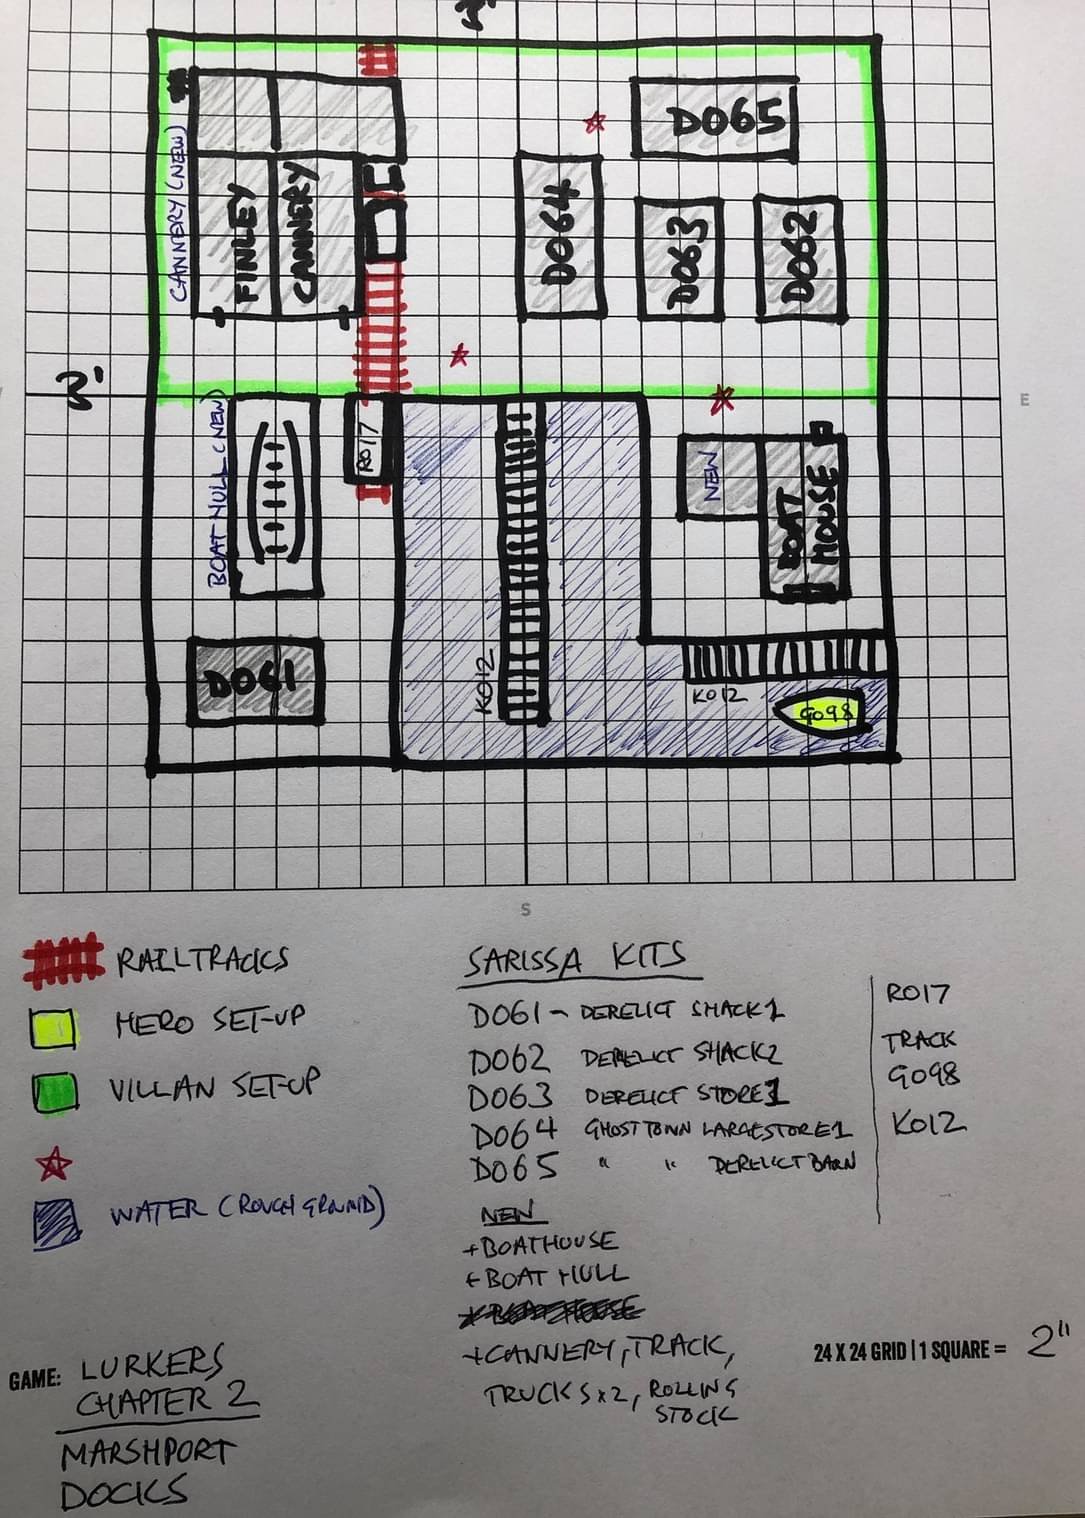
Sarissa Buildings - Lurkers scenario 2
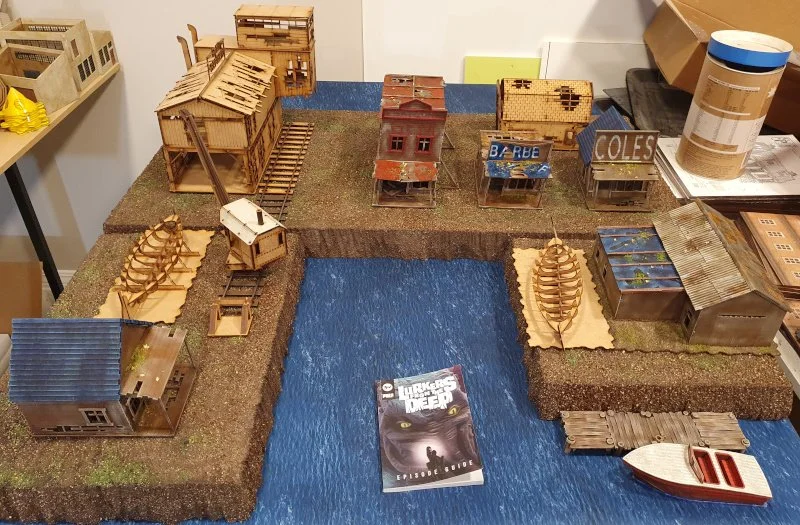
/Im getting ready for some games of 7TV by Crooked Dice on their Lurkers from the Deep Campaign. the Campaign has a series of games on various tables. So its a lot more terrain that i expected.
Ive completed Scenario 1 but don’t have photos yet as its pretty basic stuff, but this lot i have tried a few new things.
you can see in the photo below how i am going with the table, and i have attached an image from the designer of how the table is meant to look. so a couple more things to complete.
For the island parts i cut up some foam on a friends Proxxon, and then with my own hot wire cutter i made the edges. i made up a mix of sand, brown grout, tea leaves for the basing material. glued it down and then sealed it with thinned PVA. its not going anywhere. i added some green flock over it to make it look patchy,
Changes:
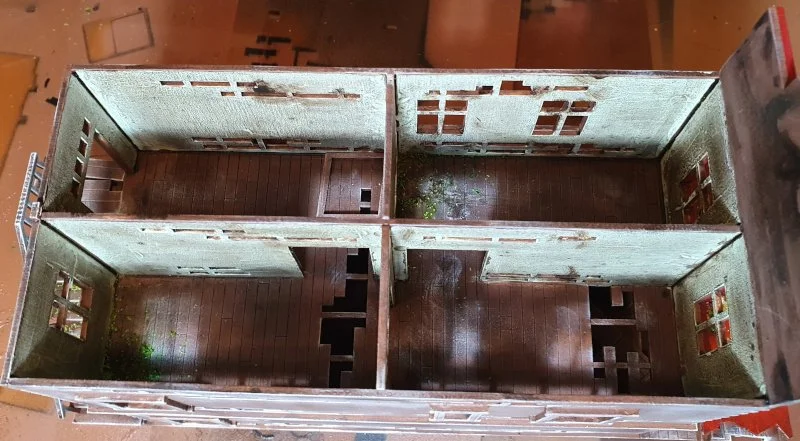
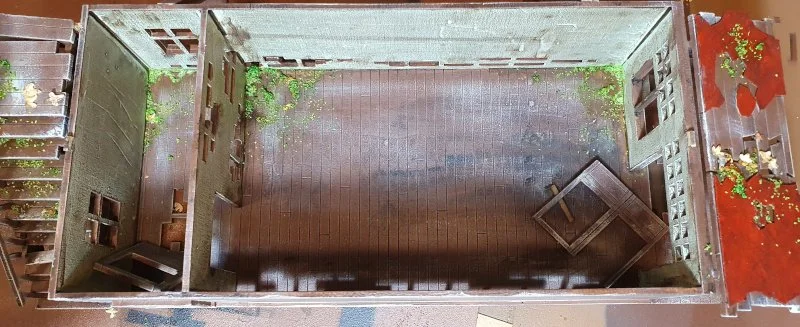
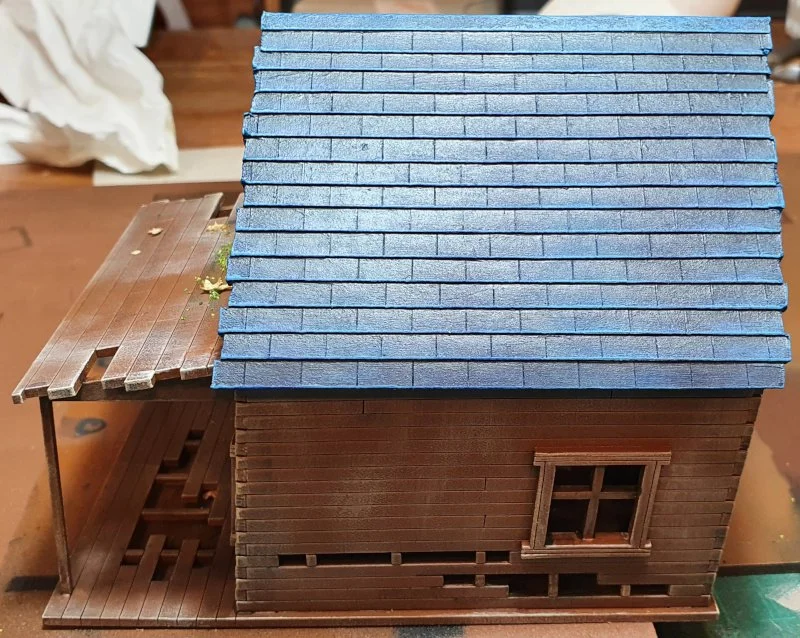
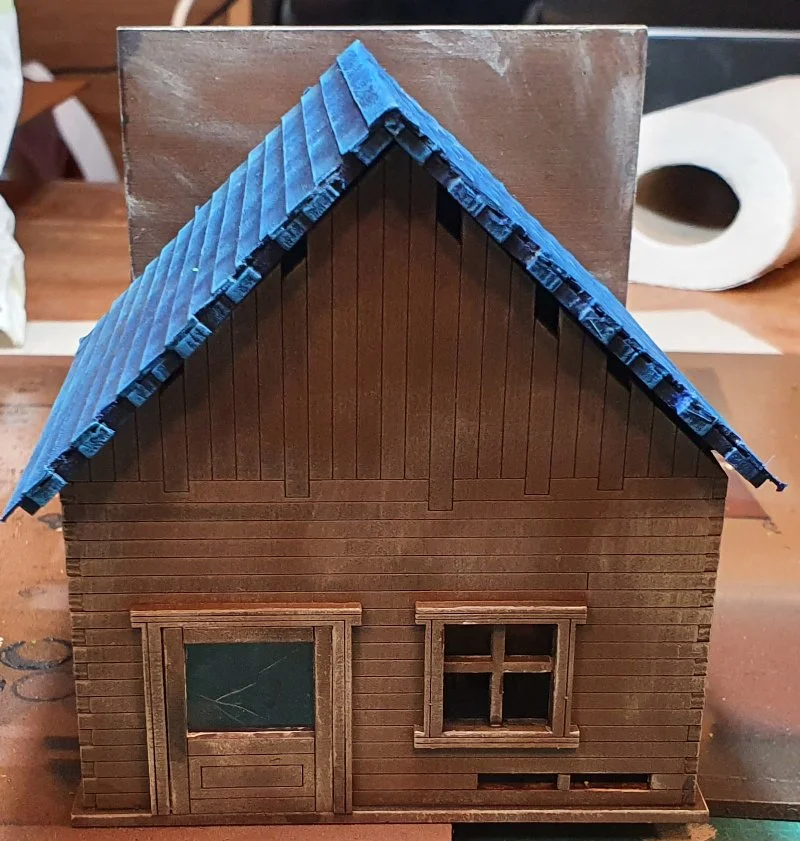
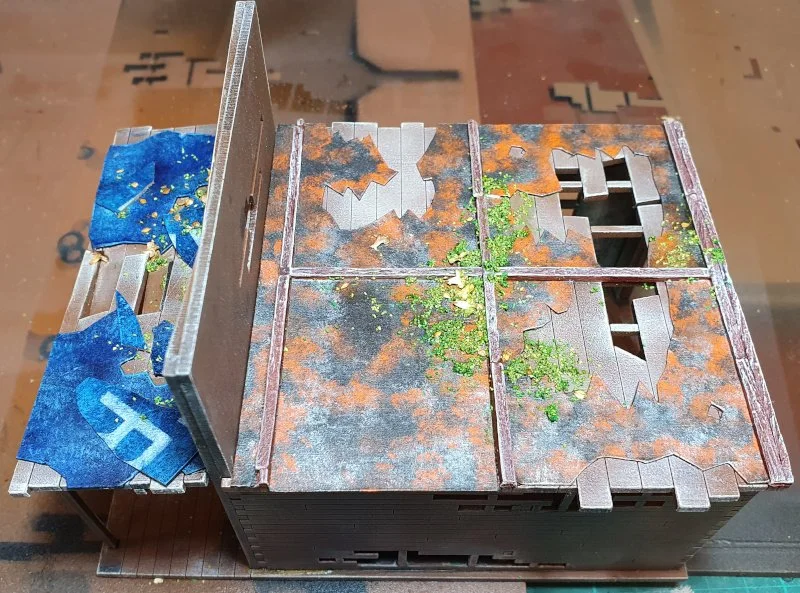
I dont like 2D details too much so where i can i like to make them. i have not done this for every part of these kits as there are so many buildings to do, but a few areas i have done are Roof shingles.
The easy part i did was to add some card for one of the 2d Details that shows over the exposed wood. this was just about tracing the shape onto thin paper and then tracing to card.
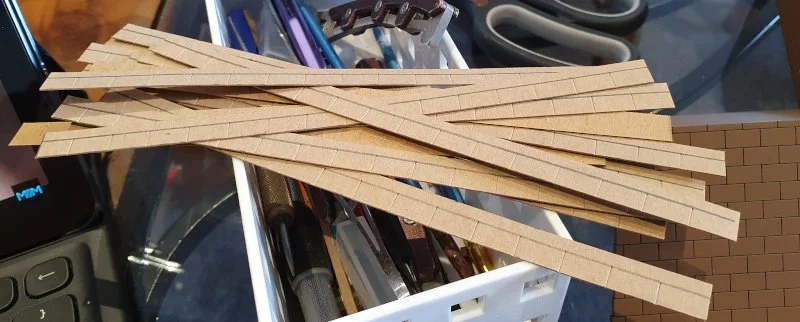
for the roof shingles, i did one version where i cut them out with a knife. this took hours. the hardest part was the individual shingle lines, which i was originally doing with a normal craft knife, but quickly realised this was slow, to used my square edge blade instead as i could go straight down.
the 2nd version was using my Cricut, which took 10 minutes to design in Illustrator and then i think it took 10 minutes to cut. So much better. I finally got the kinks worked out on my Cricut so will be doing more windows etc with it.

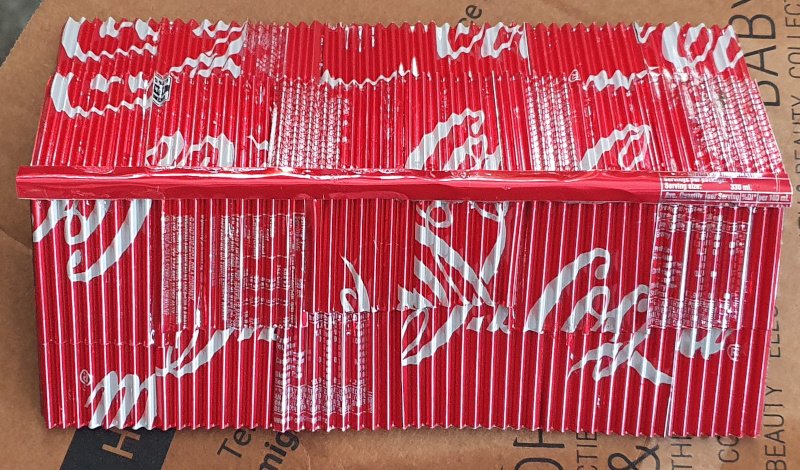
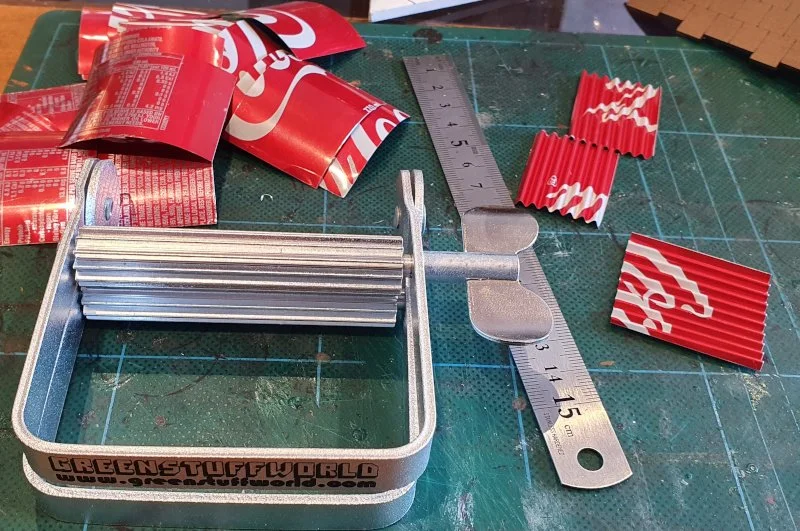
Corrugated Roof - then i got carried away and decided the boat shack should have a corrugated roof. i used a Roller i got from GSW and some of the many coke cans and made up the pieces. it was fine, but the aluminium did not like supe glue much and the overlaps got thick. the challenge with the roller is you need consistent pressure otherwise the rolls start to curve out. its not perfect but its meant to be rundown anyway. as i glued the last piece on and unstuck my finger i wondered if card would work as well, and its actually easier so the next roof i will do will be with Card. I wasted a bottle of super glue accelerant which just caused lumps, which looked bad but i used to make areas of rust.
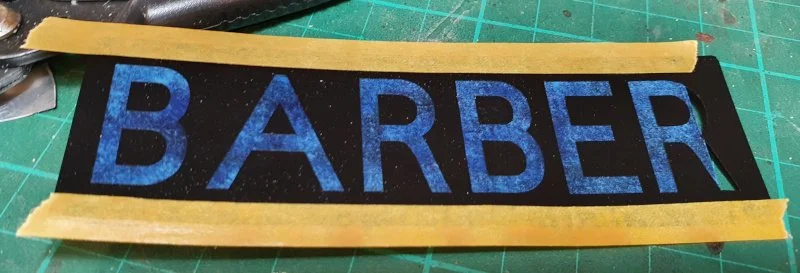
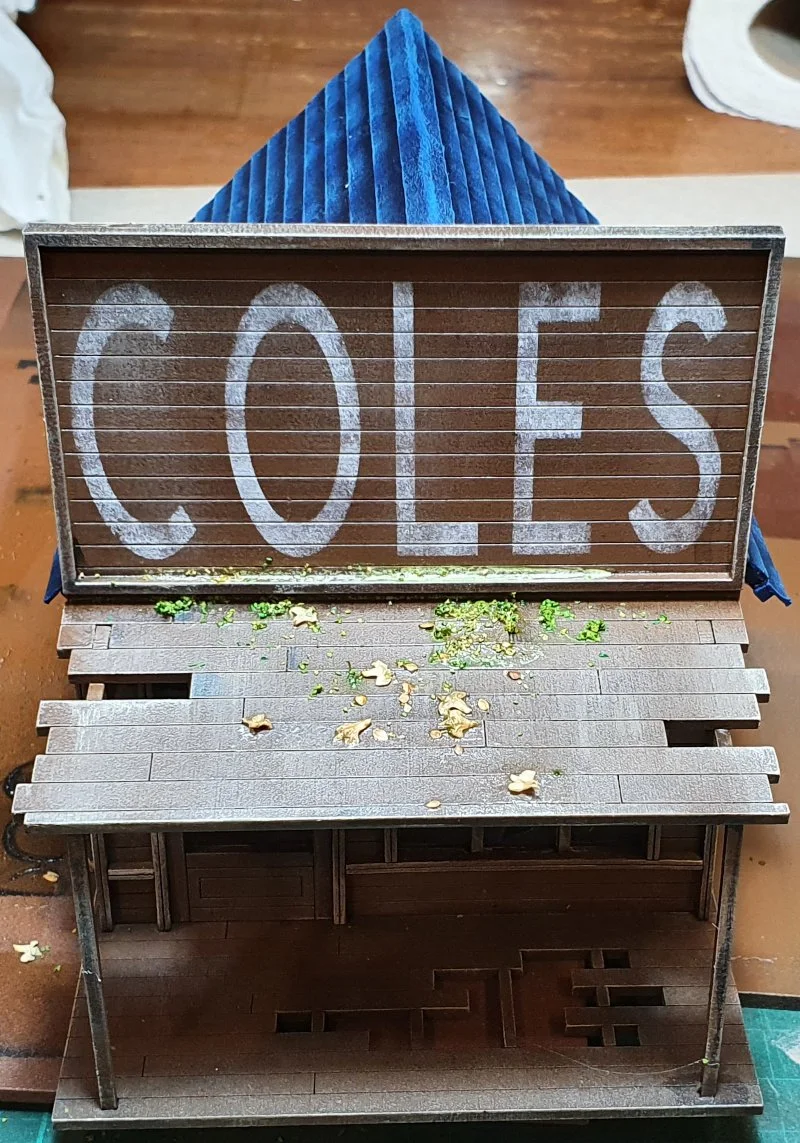
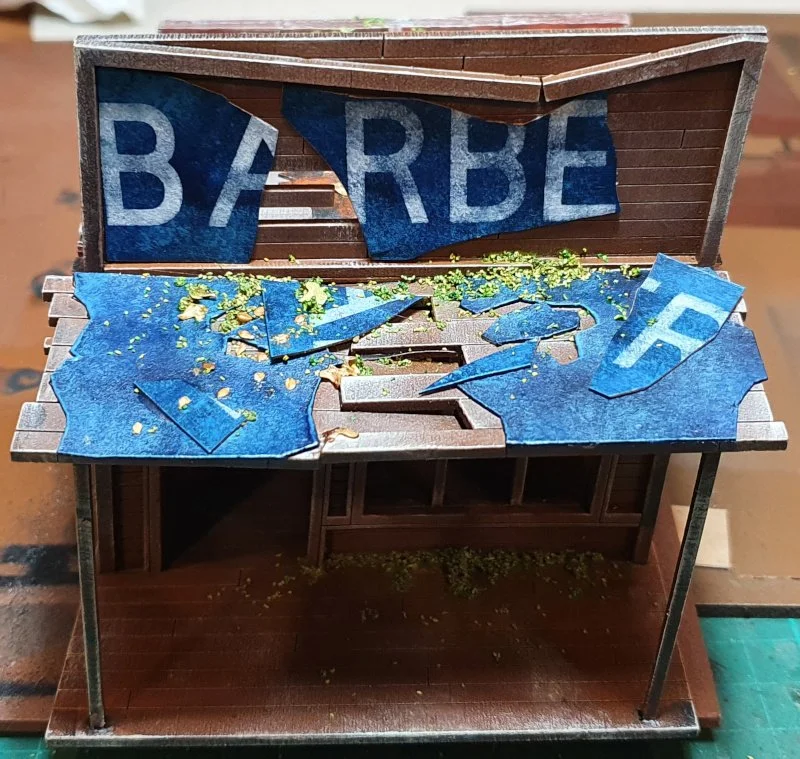
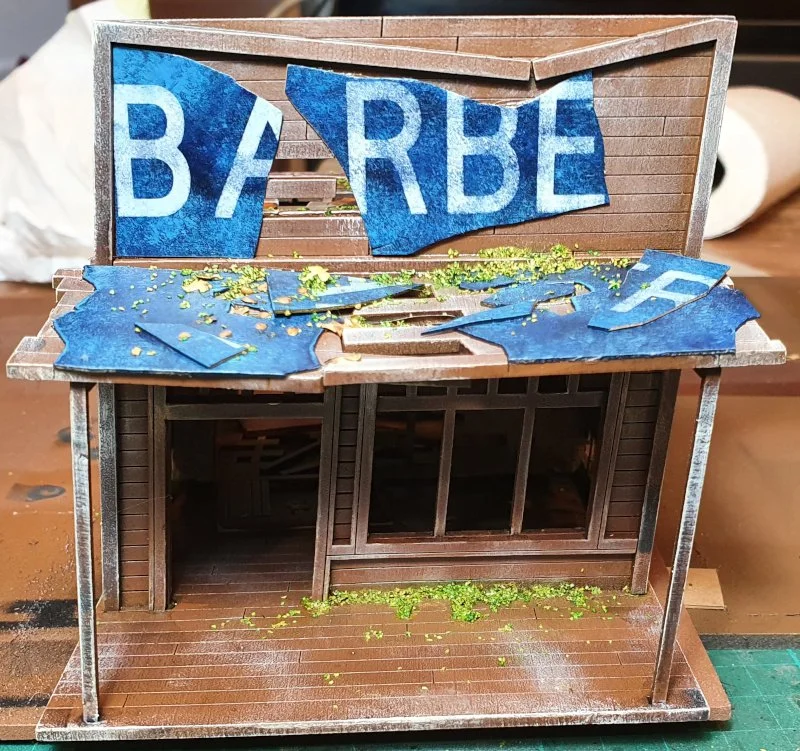
Stencils:
As some of the buildings were old shops i wanted to make signs for them. I used the Cricut again to make stencils in vinyl and covered the edges in masking tape. then i just stippled the paint into the gaps.
The on card is because that building was more run down so i wanted it to look like a sign that had fallen apart rather than painted directly on the wood. i got the length of card wrong (or the stencil too long), but as i was going to be cutting it up it was not a major issue.
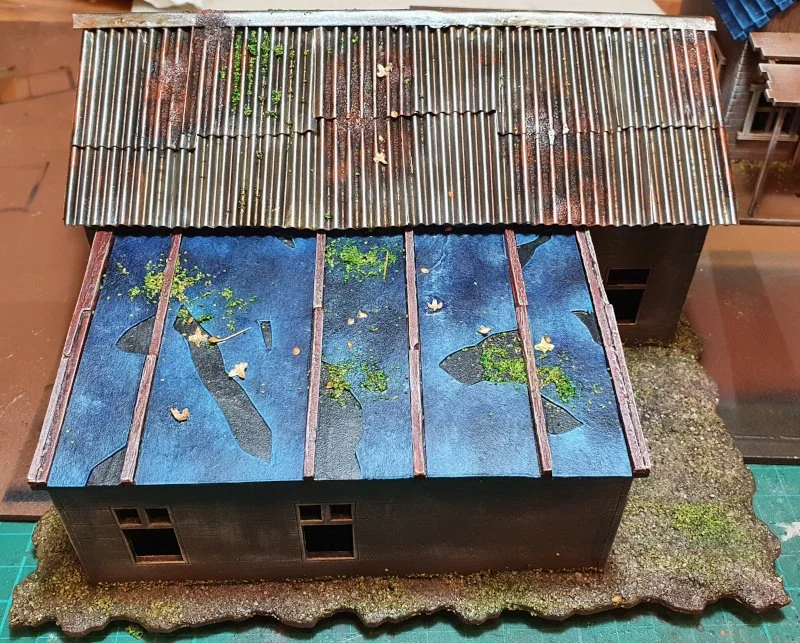
Boat Builders Shack:
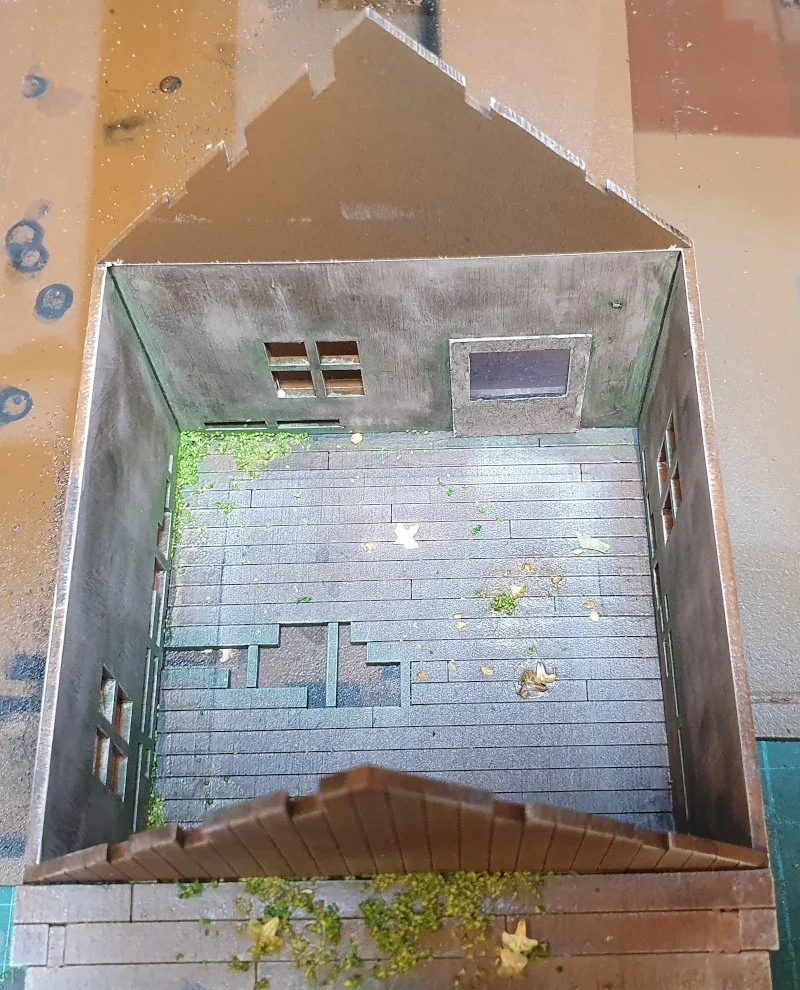
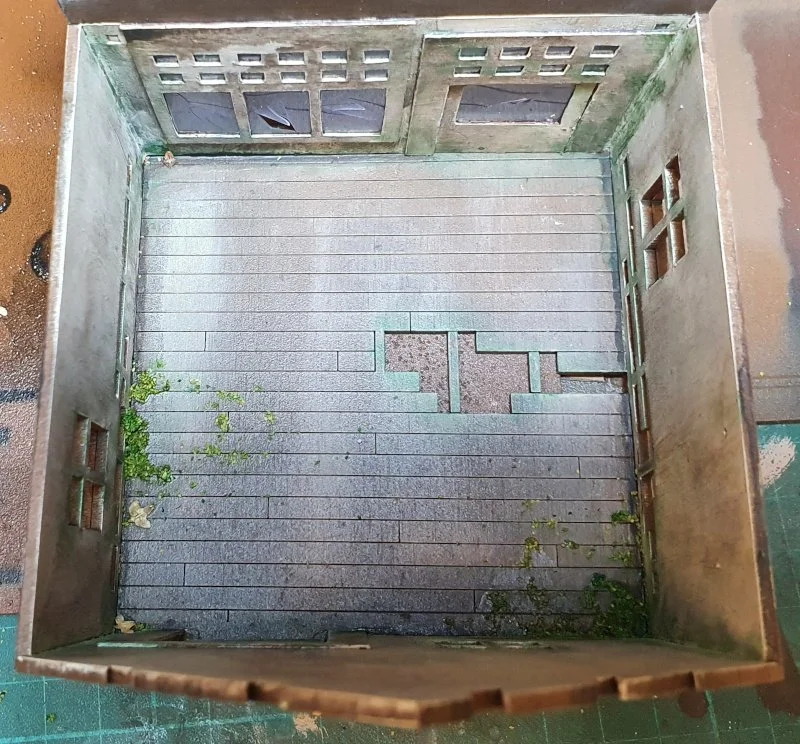
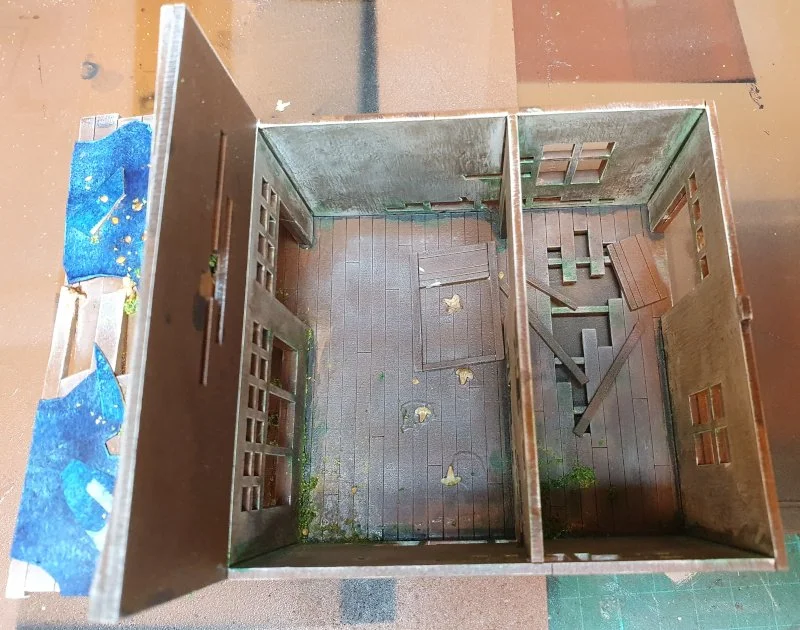
This one has both the iron roof and some of the card panels over the wood, so it was a bit of work. i used the same mix as the island bases for the exterior and then just grout for the interior floor.
I sprinkled some silica sand on the roof to use for rust texture and glued down some flock and leaves for debris.


Shack 1:
This has one of the card roofs, i cannot tell from a distance which one was done by hand and which on the cricut.
basic paint job of drybrushed wood and some scatter. I also made the windows on the doors a thing.

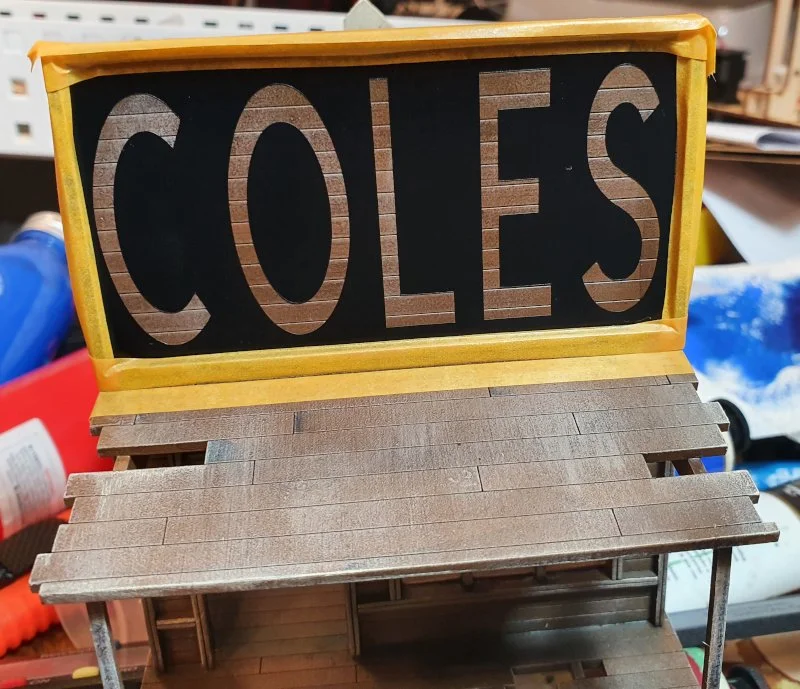
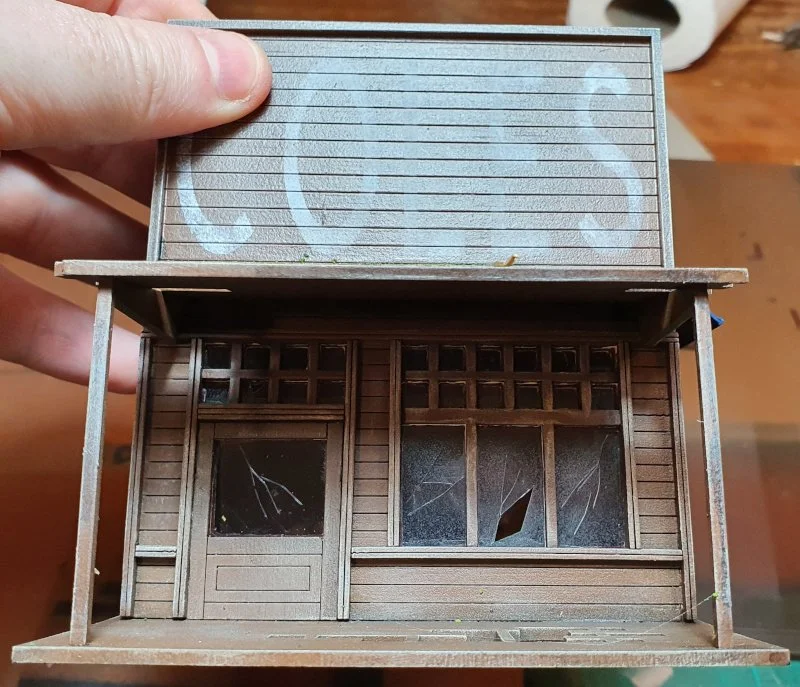
Shop Shack 1:
This is the first shack with the stencil. Coles is an Australian super market and its also one of my gaming groups last names so its a part in joke for the store. I might do some more stippling on the stencil to make it look dirtier or add some streaking but i think it looks ok.
This building has door glass and also the front windows. so that its easier to put in the plastic, i made, in card the back of the walls to cover the glass so it looks like window edging etc.
Shop Shack 2:
Another shop. Similar to the others, but this one had the stencil on card and then i cut it up and placed it on the wall and the roof.
This one also had the flat roof so i added card to 3d the card over the wood. i put scatter in side and you can see in the pic some bits of glue and shine from sealing it which i need to work out a way around.
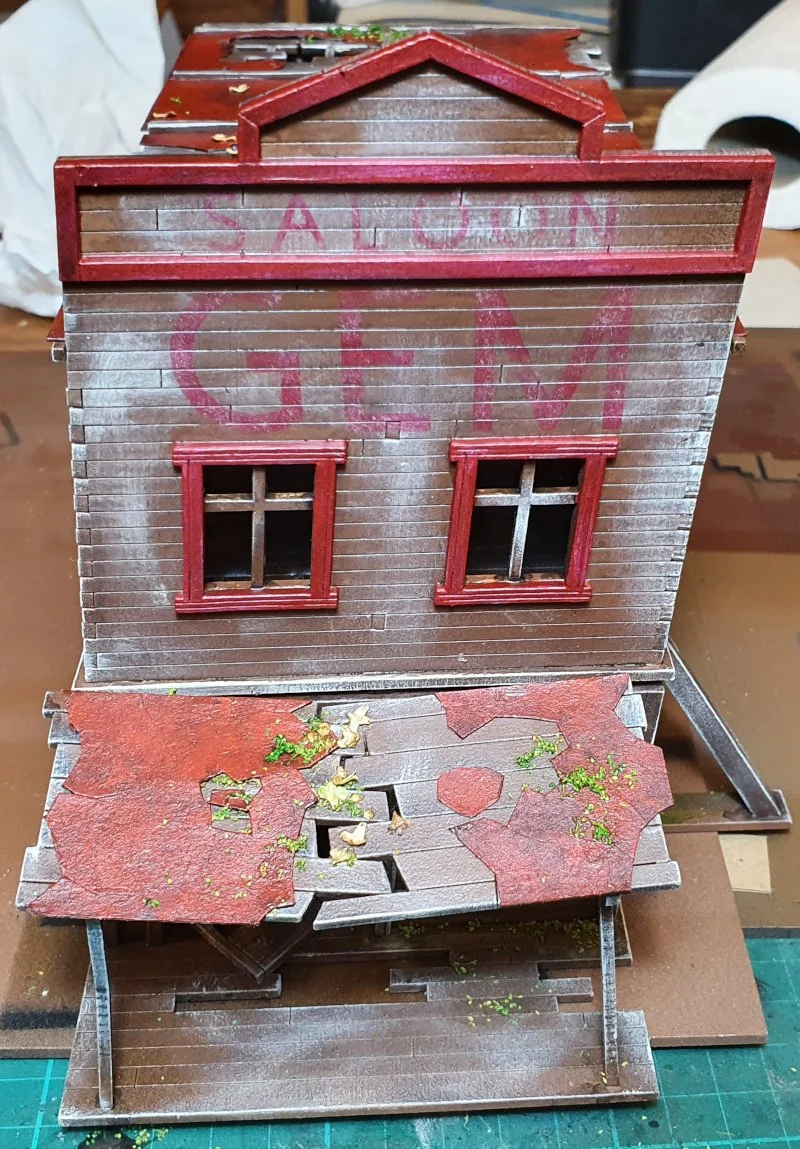
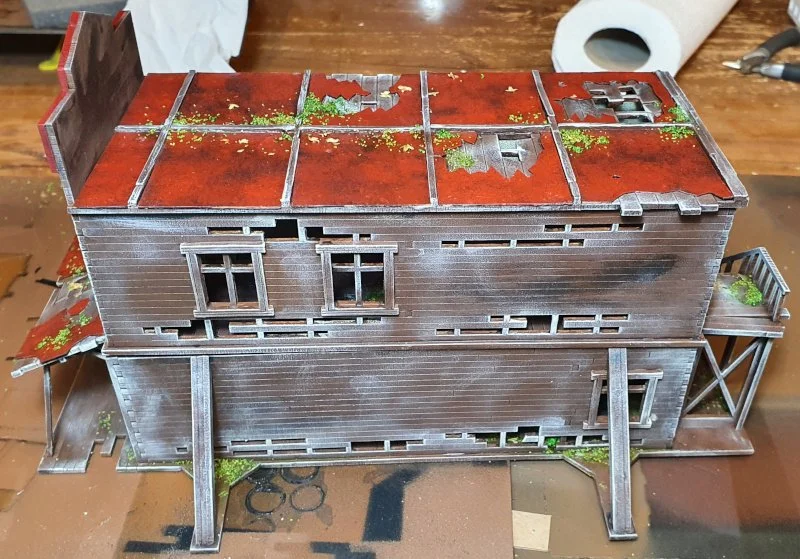
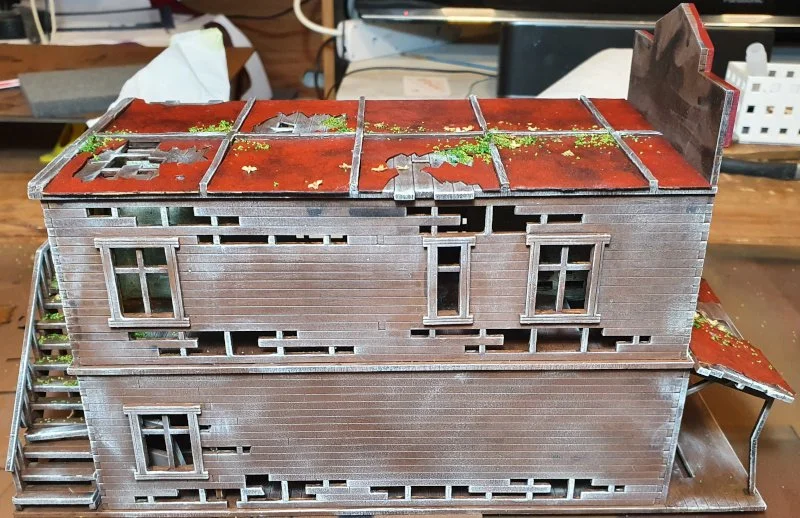
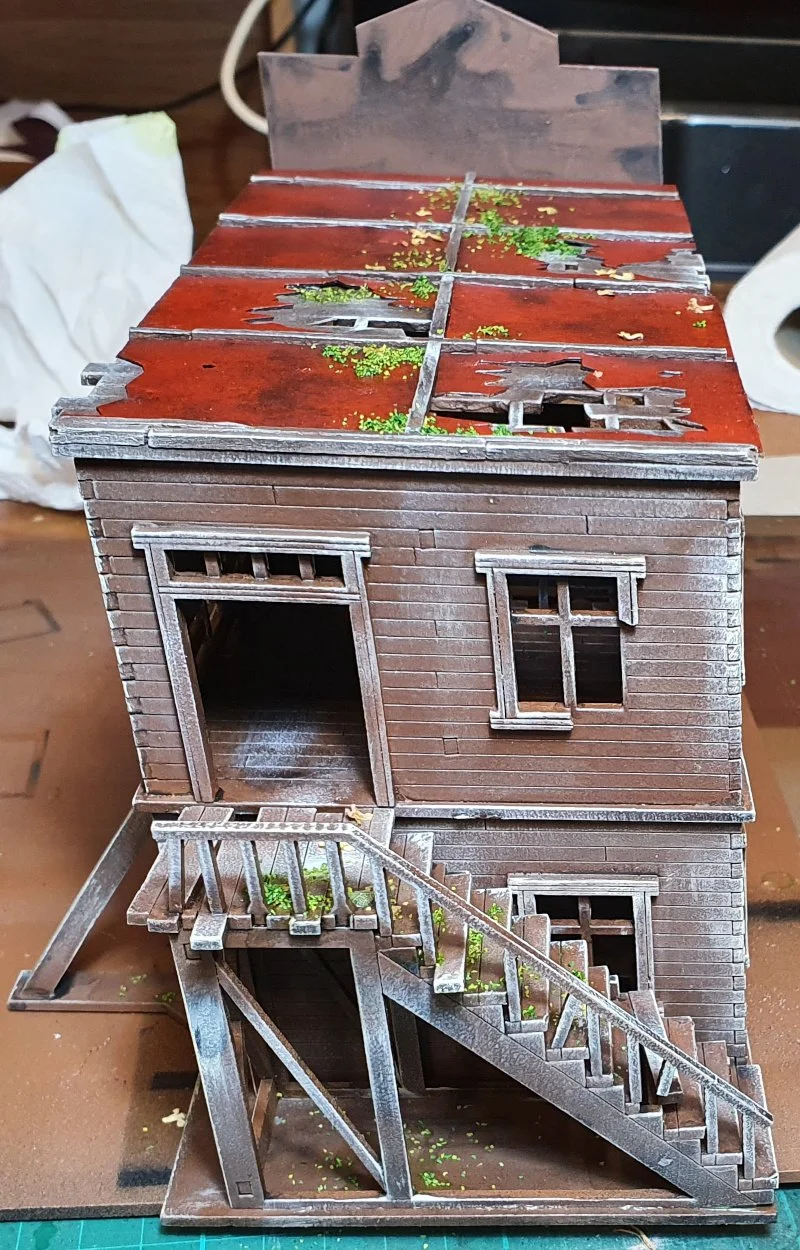
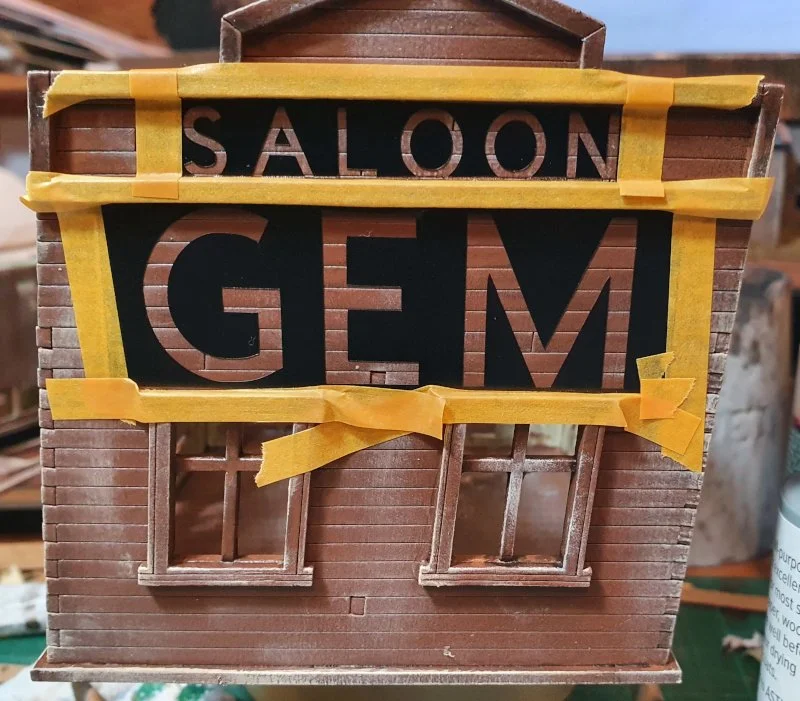
2 Storey Shop:
This is supposed to be a shop but i decided to make it a saloon, and named it after the GEM from Deadwood.
this kit was a pain, the spray paint i used originally would not let any other paint on it so i had to varnish it first. I did the same roof card and a stencil and internal scatter. i might add some grout under the stairs as dirt, i will see how i go.